
Nikons Flagship Mirrorless Camera:
A Versatile Powerhouse with Room to Grow
After pushing my DSLR to its limits, I decided it was time to step into the mirrorless era. My options came down to the Nikon Z9 and its slightly smaller counterpart, the Z8, primarily due to their impressive full-frame, high-resolution 45-megapixel sensors. Both models have earned praise across the board, but with the Z9 priced at approximately $5,500 USD, the question remains: is the investment truly justified?
- Technical Details
- Pricing
- Set up & Custom Function Buttons
- Back Button Focus
- Shooting Banks & Sample Images
- Pre Release and Auto Capture
- Shooting Monochrome with the Z9
- Conclusion

The Nikon Z9 stands as the brand’s flagship mirrorless camera, engineered for professional photographers seeking unparalleled speed, accuracy, and image quality. Its robust build and advanced technology make it a reliable workhorse, suitable for demanding shoots and diverse environments.
Canon’s Flagship equivalent would be the EOS R1 is priced more at around $6100 USD. Here’s how they compare:
- Z9 Advantages: Offers 8K video, a lower base ISO, higher resolution, and faster FPS in both RAW and JPEG.
- EOS R1 Advantages: Supports a higher ISO, features a faster electronic shutter, significantly more focus points, and is lighter in weight.
Technical Benefits
Weighing in at 2.9 lbs (1340g), the Z9 is heavier than the D850 and significantly more so than the compact Z8. While most of the specifications remain consistent among these mirrorless models, the Z9 boasts notable design enhancements, such as a raised settings dial and several standout features, including:
- Blackout-free viewfinder enabled by dual data pipelines
- 120 FPS continuous shooting in JPEG format
- Auto Capture with delayed shooting mode
- Unlimited 4K recording and up to 2 hours of 8K video recording
- Built-in GPS for automatic data recording

Favorite Features
- Ultra-high-speed capture at up to 120 fps (JPEG)
- Continuous shooting at 20 fps in full-resolution RAW + JPEG
- Pre-release capture function to ensure you never miss the moment
- 45 Megapixel stacked CMOS chip for versatile cropping options


#Z9 #emermcdaid @emermcdaid #nikon
Size and Weight
The increased size of the Z9 (approximately 30% larger) is mainly due to the battery grip and dual controls, which facilitate easier vertical shooting and nearly double the battery life compared to the Z8 (700 vs. 340 shots). For photographers in the field, extended battery power is essential. In an all-digital system, a drained battery turns your camera into an expensive paperweight. In such situations, only a film camera would remain useful.

Its also worth noting technical updates often make their way down to more affordable models, which can sometimes serve as beta testers for new features. As a result, stable software updates are more likely to reach the Z9 sooner than many other models.
Pricing

For most of us, price remains the primary consideration. As a professional, it’s not just about whether the equipment is reliable but also evaluating the return on investment (ROI). I tend to hold onto a camera until it is beyond repair or, on this occasion, until a falling Gitzo head ends its life.
Shop around for a bundle
If you keep an eye out, you can find a great bundle, especially if you already own quality lenses. I managed to get mine with a lot of additional items included: an FTZ II adapter ($330 CAD), a memory card ($280), a second battery ($300), and a Delkin card reader ($100). With over $1,000 worth of essential extras, the price gap between the Z8 and the Z9 narrows to just 20%.
I have also seen zero interest financing starting to appear for Nikon gear. This could be useful if you your income is regular and likely to remain in place.
Regarding the adapter, don’t assume that your older, high-quality f2.8 zooms will automatically support autofocus with the Z9.
Pre Z9 Gear List
My ‘traditional’ kit and Z9 compatibility:
- 50mm f/1.2 – Always manual focus
- 60mm macro f/2.8 D – No autofocus
- 80-200mm f/2.8 D – No autofocus
- 17-35mm f/2.8 D – No autofocus
- 14-24mm f/2.8 G – Compatible
- 200-400mm f/4 – Compatible

Recently, I streamlined my kit to just one wide lens and a 28-300mm. The latter is in my opinion, one of the best all-around travel lenses available.
The 200-400mm remains my go-to for wildlife photography. If I have compatibility with this, my 28-300 and a standard lens, Im satisfied.
Over the years, I’ve captured everything from fashion magazine covers to travel spreads. These days, I spend most of my time photographing wildlife and guiding other photographers on tours in Africa. However, that work is seasonal, so a comprehensive wildlife shoot review of the Z9 will come from my next photo safari

I experimented with the Z9 for a month before organizing a shoot in the Seychelles. This location was ideal for testing a range of travel photography scenarios. Landscapes, seascapes, fashion, and both flora and fauna.
I’m not a fan of heavy strobe usage, preferring natural light and fill light on location. As a result, my kit was kept minimal: three lenses, a tripod, a reflector, and a single strobe with various light modifiers.
General Setup
For a quick start these are my essential settings
Firmware Update – Set up Menu (spanner icon) – last item

Raw – Photo shooting menu

Set size to Large, Image quality to RAW + Jpeg basic. This will allow Nikons Snap Bridge mobile app to receive a copy via blue tooth without filling up your phone with large files.
Copyright

Add your details to auto fill as meta data on every image.

Picture Control

This setting allows you to modify the preset looks down to
sharpness, tone, filter effects etc. and then save the results. I have it set to Neutral as I post process and store everything in lightroom.
Metering

My preference depends on the subject. For interiors and landscapes, matrix metering works best due to its ability to balance light across the frame. On the other hand, center-weighted metering is ideal for people and wildlife, as it emphasizes the subject while maintaining proper exposure
Sensor Cleaning

This feature is located in the setup menu. I’ve set mine to clean the sensor automatically upon shutdown. Additionally, the sensor shield closes during this process, which is not only convenient but also a brilliant innovation. This feature is especially useful in challenging environments, where it provides extra protection when swapping lenses.
Addition Settings
Auto Rotate Info Display – On
Camera Sound – On, Volume 4 Type B
Touch Controls – On
LCD Button illumination – On
Custom Function Buttons
The Z9 offers an impressive 12 customizable function buttons, allowing for extensive personalization. You can access these under ‘f2’ (Shooting Controls).
I set up mine for easy shooting between interior, exterior and wildlife images


Here are my primary settings:
Fn1: Access Shooting Banks
Fn2: Default – Image Area
Fn3: Virtual Horizon
Fn4: Zoom-in view for the LCD screen
Z9 Back button focus – Easy one button set up

Back Button Focus:
I always rely on back-button focus—it’s a game-changer. Give it a try, and you won’t be disappointed!
Easy Back button Focus set up with the Z9:
- Ensure the AF-On button is enabled (default setting). You can check this under f2 – Custom Controls.
- Go to the Custom Setting Menu (pencil icon)
navigate to the Focus menu (‘a’), and set a6 to AF-ON only.
This ensures the shutter release button doesn’t activate focus, giving you full control via the AF-On button.
Note: Setting might become corrupted due to Shooting Banks. Details here
If you shoot a wide variety of subjects in different conditions, the Shooting Banks are incredibly helpful. That said, they might benefit from a few additional tweaks for optimal usability.

Excluding the 14-24mm lens the majority of images for this review were taken with my my favorite travel lens.
The hugely versatile 28-300mm
Read a full review on the lens
Here
Shooting Banks
One of the standout features of the Z9 is its extensive array of customizable buttons. Combined with the ability to rename and organize shooting storage settings (A to D), this makes tailoring the camera to your needs incredibly straightforward.

After Setting up the shooting backs I assign choosing them to my Fn1 for fast changing during a shoot.
For photographers capturing a variety of subjects, this flexibility is invaluable, enabling seamless transitions between settings with just one touch. Here are some recommendations:
Shooting Bank A
Action Freezing and quick shots

Shutter Priority mode
Single point continuous focusing
ISO auto
No tracking
Matrix metering
Low/High FPS

Having shot with the D850 and a Hasselblad the resolution of the Z9 didnt disappoint at all. I would love to see High Res RAW files available across all fps burst modes.


Tip:
For added sharpness my favorite software tool is Topaz Al reviewed HERE


Shooting Bank B
Dedicated for HDR interiors


Aperture priority
2 Second delay
0.2 seconds shutter delay mode
3 frames with 3 stop variances between each
Iso fixed to 400
Timer release mode
Tripod mounted
LCD touch screen used for focusing
Function button 4 changed to live zoom 100% to check on focusing
Being able to recall these settings with the press of a single button is a huge time saver. After merging in Lightroom, the tonal balance achieves near-perfect results. I use pre- and post-processing profiles for the images, ensuring consistency across the entire shoot without requiring additional editing.

The Nikon Z9, of course, has its own built-in HDR mode. Specifically, it can produce single or series images, output to RAW, and allows for the adjustment of HDR strength.
I’m planning to experiment with this feature in the near future. I’ve heard that Sony cameras are widely regarded as some of the best in the field for in-camera HDR. I hope to do a performance side-by-side comparison with with the Z9.
Shooting Bank C
General Purpose images


Program mode
Single point continuous focusing
ISO auto
No tracking
Center average metering
Single Shot mode
This setting is designed to function as an all-purpose bank. The program mode automatically balances shutter speed and aperture, while the auto ISO takes care of the remaining adjustments. With the Z9, parameters can be configured to set maximum and minimum ranges, ensuring quality is maintained—similar to other Nikon models.


Shooting Bank D
Action and tracking
Decided to try out a few option mostly the bird eye detection with continuous auto focus.


AF-C
Wide Tracking
Bird eye detect
15 fps
Shutter priority
Auto Iso


For birding, the Nikon Z9 performs exceptionally well when photographing static subjects, especially those that are close and positioned against clean, uncluttered backgrounds. The camera’s eye-detection autofocus is highly effective, easily locking onto the bird’s eye for sharp, precise shots.
Tracking Issues
When it comes to more challenging scenarios, such as birds in flight, the Z9 does a good job, though its performance can vary depending on factors like distance and contrast. Naturally, as the subject moves further away or if the bird has low contrast against the background, the autofocus system might require additional fine-tuning to maintain consistent tracking.
In the below pictures there is an increasing loss of focus lock on as the background becomes cluttered.


Shooting Bank Issues
The Z9 currently does not retain the Exposure Delay Mode setting within individual shooting banks. This requires a manual reset each time you switch banks, which appears to be a software oversight since the menus suggest the setting should be stored.
Another observation: the native folder structure automatically assigns images from different shooting banks to separate folders. While this might work for some, it wasn’t ideal for my workflow, as I prefer all images in one folder for a unified project. I had to manually reassign files to their original folder location.
Photo Safari with the Nikon Z9
My upcoming photo safari in October will be the ultimate test of the Z9’s tracking capabilities. To date, I haven’t found a camera that can reliably track a lion weaving through tall, dry grass without occasionally losing focus. This trip will challenge the camera to anticipate the subject’s next position based on its speed and distance, rather than simply waiting for it to reappear in clear focus.
For shots like the examples below, I rely on Aperture Priority mode, hold the back button for focus, and precisely place the focus point where it’s needed. Assigning the focus point back to the center of the frame is a quick adjustment using a dedicated function button, allowing for smooth and efficient changes on the fly.


D850 350mm 1/640 f7.1 iso 100
You can see my lightweight custom rig here
The results of this technique are evident in the close-up shot—focus and sharpness are spot on. You can even see the reflection of my vehicle in the lion’s eye. This is the standard I’ll be looking for the Z9 to match and, ideally, surpass by incorporating advanced tracking capabilities.
Frames Per Second Upgrades
While a high frame-per-second (fps) rate is undoubtedly beneficial, I prefer shooting at 50 fps in full-resolution RAW over 120 fps in normal JPEG. Nikon has acknowledged the fps limitation and started addressed it with the recent software update 5.0, which now offers 30 fps in JPEG Fine as opposed to normal or basic.
Two modes that I am looking forward to testing on safari are the Z9
Pre Release and Auto Capture
Pre-Release Mode
The Z9’s Pre-Release mode is a game-changing feature designed for capturing high-action scenarios such as sports, wildlife, and other fast-paced subjects. In this mode, pressing the shutter button or the AF back button initiates image caching. You can customize the caching duration for high-speed frame capture, ranging from 30 to 300 seconds, depending on your needs.
Once you fully press the shutter, the Z9 records 1 to 4 seconds of images at your chosen frame-per-second (fps) settings, assuming you have a large enough memory card! At the highest setting of 120 fps, even a few seconds can result in a huge number of files, so it’s important to choose your settings thoughtfully.


These are the sorts of images I get on safari. Taken with the D850 in burst mode. The Z9 pre release will be extremely handy in scenes like these.

To streamline reviewing, you can use the playback menu to mark the first shot in a series or navigate directly to the first or last image in a burst. Adding Pre-Release Mode to your ‘My Menu’ ensures quick access, making it a practical tool in the field.
Visit the dedicate Z9 Wildlife Review
Auto Capture Mode


The Auto Capture mode transforms the Z9 into a high-quality, customizable camera trap. It allows you to configure the shutter to fire automatically based on subject type, movement, distance, or a combination of all three. This feature is highly adaptable, with the ability to store and rename up to five complete presets, giving you flexibility for various scenarios.
Auto Capture can also be combined with Pre-Release Mode, enabling the camera to record the subject entering the frame—even if the auto trigger is set to respond to a specific area of the image. For dynamic subjects, such as birds with large wingspans, it’s always a good idea to shoot slightly wider to allow space for cropping. Thanks to the Z9’s high resolution, you can comfortably crop in post-production without sacrificing image quality, even at lower fps settings.
Both modes represent the Z9’s cutting-edge ability to anticipate and capture decisive moments, making it an exceptional tool for high-stakes photography.
Auto Capture Issue
Auto Capture works seamlessly with the Movement and Subject Detection settings, delivering impressive results. However, there’s a limitation when using the Distance Mode—it requires a Nikon Z-series lens to function. Older Nikon F-mount lenses are not compatible with this feature.
This limitation arises because the Z9 relies on Z-series lenses to act as part of a rangefinder system, providing precise distance data. Without this functionality, setting a specific minimum and maximum distance—such as capturing a bird in flight within a defined range—is not possible unless you upgrade to a Z-mount lens.
While this may be a drawback for those with a collection of legacy glass, it underscores the enhanced integration and technology in the Z-series system. If Distance Mode is crucial to your workflow, an investment in Z-series lenses may be necessary to fully utilize this feature.Auto capture works great with the movement and subject detection setting.
Shooting Monochrome with the Z9


Like most Nikons the Z9 has a Monochrome Picture setting.
Photo Shooting Menu (camera icon) – Set Picture Control -MC Monochrome.

The menu offers the option to select Black and White and further refine the look by applying filters to control tone and contrast.
Red, orange, and yellow filters progressively reduce sky brightness, while the green filter softens skin tones. These adjustments can be customized and saved as a new profile for future use.
I typically avoid shooting in native monochrome, preferring instead to process my color files in Lightroom or Photoshop to maintain maximum flexibility. The Z9’s impressive dynamic range at its base ISO provides an excellent foundation for post-processing, allowing for a wide tonal spectrum and deep contrast that translates beautifully into black and white.
While its competitors hold a slight advantage at higher ISO settings, the Z9 still delivers impressive results, retaining detail and depth even in challenging lighting conditions. Certain scenes, like the examples below, (Shot with the D850) naturally lend themselves to black and white conversion, highlighting textures, contrasts, and mood. I’m optimistic that my upcoming shoots with the Z9 will provide opportunities to explore and refine this creative approach.


Dynamic Range, SNR & Color sensitivity
Landscape scenes featuring complex tonal ranges in the sky and water delivered results with smooth, natural tones and no banding. At a base ISO of 64, the Z9 slightly surpasses its rivals, offering a color depth of 26.3 bits and a dynamic range of 14.4 EV. The output is on par with, if not superior to, the quality of legendary fine films like Kodachrome 64 in my opinion.


When compared to the Sony A1 and Canon EOS R3, the Z9 excels in image quality at base ISO. However, it falls slightly behind its competitors in signal-to-noise ratio, dynamic range, and color sensitivity at ISO levels above 1000.

Favorites Features
I’m planning to give the Z9 a full workout next year during my Africa photo safari. I’m particularly excited to test its tracking capabilities and experiment with the Pre-Release feature. However, I don’t see Auto Capture being very practical for safari photography, as the focus is usually on actively tracking and finding animals rather than waiting passively for them to appear.
That said, the Z9’s body design includes some standout features, especially for those transitioning from cameras like the D850.
One of the most impressive upgrades is the battery mount. It’s the most secure I’ve seen on any Nikon, featuring a robust locking mechanism built into the cover/holder. The design is large and sturdy enough to handle comfortably, even with gloves—a vast improvement over the flimsier covers found on previous models.
Another highlight is the fully articulated screen. While most cameras I’ve used had swivel screens, Nikon often excluded this feature from its pro models, such as the D6. For me, that was a creative limitation, especially when shooting low-angle subjects or holding the camera above eye level. The screen tilts not just up and down but also left and right, making it incredibly versatile. I use this feature daily, particularly when shooting vertically on a tripod at angles below eye level. It’s an essential tool for creative compositions and adds tremendous value to the overall shooting experience.

My only concern with this feature is that it feels overly engineered, with numerous moving parts that could potentially fail over time. A simpler, more streamlined design would likely be more robust and less susceptible to issues like dust, water, or general wear and tear. The Vertical latch in particular could be redesigned.
Conclusion
One of the greatest strengths of an all-digital camera system is its ability to evolve and improve through software updates. The Nikon Z9 exemplifies this, with over seven firmware updates to date. The most recent major update, version 5.0, introduced significant enhancements, including updates to Auto Capture, Pre-Release Capture, and Picture Control, among other features. These updates not only refine the user experience but also extend the camera’s lifespan by keeping it competitive and relevant in a rapidly advancing field.
If you’re considering investing in the Nikon Z9, there’s a lot to appreciate. Its top-tier performance, advanced autofocus capabilities, and robust build make it a standout choice for professionals and serious enthusiasts alike. The ability to grow and adapt alongside your creative ambitions—thanks to Nikon’s commitment to regular updates—makes it more than just a camera; it’s an evolving system designed to meet your needs today and well into the future.
For photographers looking to make the leap into a mirrorless system that delivers professional-grade handling, cutting-edge technology, and the promise of future innovation, the Z9 offers exceptional value. It’s a significant investment, but one that’s likely to pay dividends in reliability, functionality, and creative freedom. If you’re ready to embrace a tool built to push the boundaries of what’s possible, the Nikon Z9 is a worthy contender.
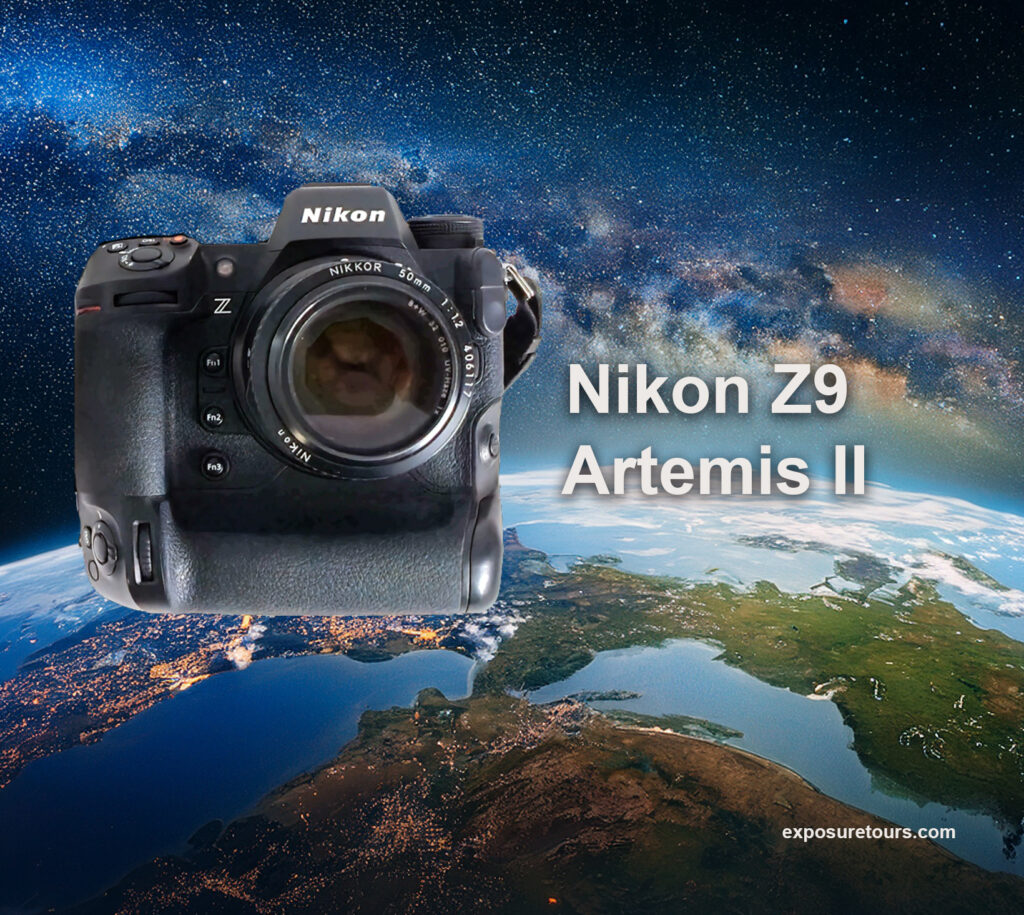
2026 UPDATE: Nikon Z9 goes into space
Like the Wildlife Pictures?
Join our next photo safari
Check out a 2025 update of the Z9 used on my trips to Brazil and Spain
https://focus-on-photography.net/threads/nikon-z9-review-and-field-test.643/